1. TUNE THE CHANGER
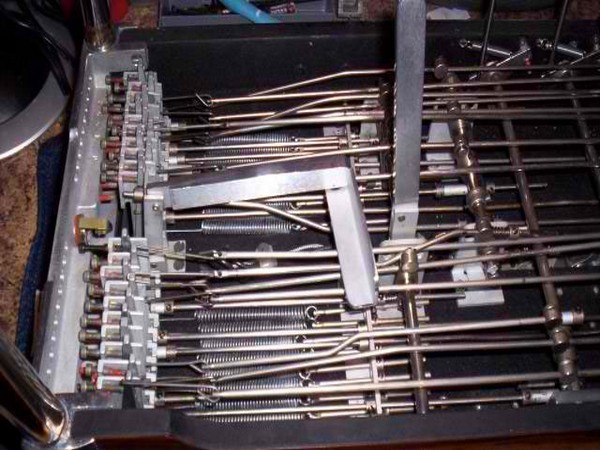
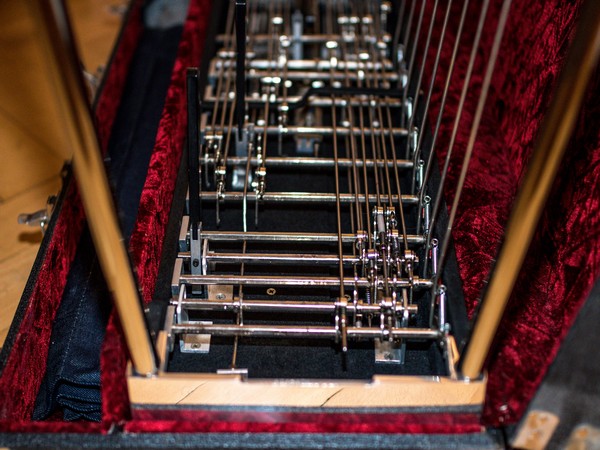
For the pedal or knee lever that you are setting up, reach under the guitar and push the bridge finger for one of the strings you plan to raise, left all the way until it hits the body of the guitar. Hold it there and tune with the left hand at the keyhead- tune the string to the note you want it hit when you raise it. Next release the bridge finger and tune the string with the raise tuning screw on the guitar endplate to the open unraised note. Repeat the above for each string you want to raise with the pedal or knee lever. For any string you want to lower with the pedal or knee lever reach under the guitar and pull the bridge finger for that string right toward the endplate until it reaches the note you want it to lower to. Withyour other hand reach over and turn the endplate tuning screw for the lower (the upper screw of the two endplate screws) so that it is touching solidly the lower finger held with you other hand.
2. RELEASE ALL COLLARS AND PEDAL/KNEE LEVER STOPS
On each raise and each lower of the pedal or knee lever you are setting up, undo the screw in the collar nearest the bellcrank. Then release the screws on the collars that set the travel length for the knee lever (if that’s what you are setting up). If you are setting up a pedal, back out the large screw that sets the travel length on that pedal so that it no longer hits the bar on the front apron of guitar.
NOTE:
This is a common pitfall with inexperienced owners. When they get one string or pedal working exactly the way they want it to they do not want to change it for fear of losing what they have worked so hard to get. The most common scenario you will run into is as follows after many hours of work you have several pedals and knee levers set up perfectly BUT on the last one you suddenly realize that the only way can you can get at some screw that will let you complete their final task is to removenumerous rods on the pedals you have just set up. You have to get used to it and just plunge ahead. If you follow this method it will become second nature and probably resemble a root canal – not necessarily fun, but necessary.
3. SET UP LONGEST PULL
Determine which string of the strings you are raising or lowering has the longest travel. This will be the string with the thinnest gauge. Next set and tighten up the screw on the collar on the bellcrank of this string so that when you push the pedal/knee lever the changer finger hits the appropriate point (either the body for a raise or the lower tuning screw for a lower) that you set when you set the changer. After this you may want to tighten the screw on the travel length collar or the pedal travel screw, so that it hits its final stop at precisely the same time as the changer finger reaches its final stop. You may also wait until you have set all the other pulls before doing this, however the distance will be the same.
NOTE:
What you want to hear at this point when you depress your pedal or knee lever, isa distinctive click. This is music to an Emmons owners ears. This click is the sound of the travel adjustment screw hitting its final stop. If the pedal feel is good and you here the click it usually means it is setup right. On a pedal with a string lower, listen closely to make sure the click is coming from front apron or the knee lever stop and not from the changer. If its coming from the changer, it means that the lower rod is hitting the endplate tuning screw before the travel adjustment screw is hitting its final stop. Adjust to correct.
4. SET REMAINING PULLS
Now set all the remaining raises or lowers so that the fingers they are actuating reach the final tuned points at precisely the same time as the longest pull you set above.
NOTE:
It cannot be overemphasized how important it is to have all the raise/lower pulls reaching their final travel points along with the travel adjustment collars or screws, at exactly the same time. If you don’t the pedals or knee levers become stiff and eventually, because they are working against each other, will work their way out of adjustment. Now set all the remaining raises or lowers so that the fingers they are actuating reach the final tuned points at precisely the same time as the longest pull you set above.
5.TUNE AND CHECK
Tune the guitar and go over all the pulls, even the ones you have not set up, as one adjustment on one pedal may effect other pulls, (even on the other neck of the guitar). If everything works:Problem:
The most common problem you will encounter after this is where one of the strings you have set up to raise with one knee lever or pedal, will not work properly when you want to lower it with another knee lever or pedal.
Explanation:
With the Emmons push pull guitar the changer was designed so that a raise will have priority over a lower. That is, if you lower a string with one pedal and then raise it with another, the raise will work as if you haven’t lowered it. Knowing this you can see that with the above problem you are going to have to make the raise travel of the common string longer to allow the lower to work properly.To first identify if this is your problem, look at the changer fingers. On an Emmons push pull the changer consists of two parts-a raise finger (the one with the hook attached to it) and a lower finger (the one with the lowering rod pushing against it, close to the body of the guitar). When you make a lower these two parts stay together throughout their travel. If at the end of their travel you can see them pull away from each other, no matter how minutely, you must adjust the raise pull travel. (if they don’t separate, the problem usually is that you do not have enough travel to complete the lower and the appropriate collar or pedal travel adjustment screw will have to be adjusted). To do this identify the string with the thinnest gauge on the pedal or knee lever that is raising the string in question (Remember to undo all the screws on the collars and the travel adjustment screws like you did above). This string may in fact be on the other neck (some pedals or knee levers operate on both necks) and appear totally unrelated but it is the only way that this problem will be resolved.
Solution:
Again what you have to do is increase the travel on this pedal. To do this you move the collar at the bell crank on this pull a little further from the bell crank. Now reset the pedal stop screw as you did above. From here set up all the other collars the way you did above. Now check and make sure that everything completes its travel at precisely the same time. If you have allowed enough travel on the raise, the original problem will have been corrected.
Finer points:
When you have completed the setup as described above you can substantially improve the feel of the pedals by doing some minor adjustments. They take a lot of patience and practice but the benefits will be self evident.
Improve pedal feel:
On a raise that has been set up, hold the collar and undo the set screw that holds it in place. Very carefully move it ever so slightly away from the bellcrank and tighten the screw again. Look at the raise finger when you push this pedal or knee lever and see if it still is hitting the body of the guitar when fully raised. If so move the collar again slightly. Keep doing this until the raise finger is still hitting the body solidly when fully raised and the collar cannot be moved any further from the bellcrank. Now do the same with all the other raises on the pedal or knee lever. At this point you will have hit a sweet spot where the pedal will lose whatever stiffness it had and will feel noticeably smoother.This fine tuning should be done on every pedal and knee lever on the guitar.
6. SETUP FIRST AND THIRD PEDAL:
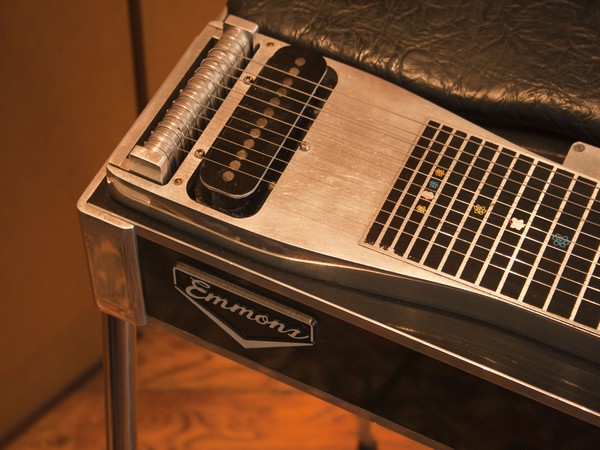
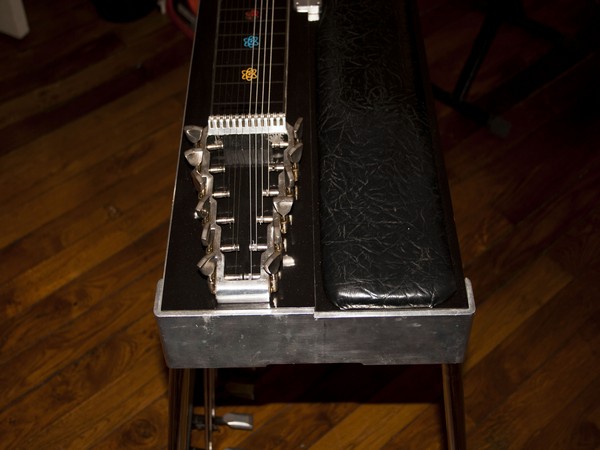
Another common difficulty arises with setting up the fifth string on the pedal 1 and pedal 3 on the E9 neck. Although they both hit the exact same note on this string, adjusting pedal 3 can be a frustrating task. For various reasons the amount of room available for adjusting the collar on string 5 is minute and very difficult to lock into. In general on pedal 3 you have to move the collar for string 5 minutely away from the bellcrank and tighten the screw. Turn the guitar over and check to see whether the string is reaching the correct pitch when raised. You may have to repeat this several times until it is correct. Further, as they both share the same tuning screw on the endplate, the only option you have is to manually adjust them with the above hit and miss method. Some guitars actually have a half-stop tuner installed on this pull which allows you to match notes exactly on both pedals thereby eliminating this source of frustration completely.
7. FINE ADJUSTMENT:
owers returns:
A common problem on older guitars (what Emmons push pulls aren’t) is strings not returning to their proper pitch after they have been lowered. This occurs mainly because the lower return spring does not have enough tension on it. These springs after years of repeated use lose some of their flex and have to be tightened up. On most of these guitars the lower return spring is attached to a rod which feeds through metal rack and is held in place by a collar. To increase tension take a set of needle nose pliers and stretch the spring with one hand and undo the collar set screw, then fasten it so that it is tight against the rack. If you over tension the spring the pedal or knee lever on that string will become stiff. You have to adjust for this while making sure the string is returning to its proper note.
Tighten it up:
When you have done all the above and feel the guitar is playing exactly the way you want it to, the final step is to go through the entire guitar and tighten every screw as tight as possible. This will ensure that all the settings that you have spent all that time making, will remain in place for as long as possible. If you use the guitar a lot it’s a good idea to repeat this every few months just to be on the safe side.It is not uncommon for a guitar that has been set up and tightened up properly to not need any adjustments for several years.
Conclusion:
With the above information and a lot of practice, you should be able to set up all the pedals and knee levers on an Emmons push pull guitar. This guide is designed to illustrate how to do a basic setup. However there are many truly talented craftsmen available who with their years of experience, can perform what can only be described as magic on your guitar. It is highly recommend that you seek these people out and have your guitar set up to its full potential.